You will need:
- A Flip nappy cover
- Scissors
- A sewing machine (you could probably hand sew this, but I prefer my machine)
- Seam ripper
- A few pins
- A small safety pin
- Elastic, 6mm or 1/4 inch in width, 4.5 inches long (1 piece for each leg and the back)
- Polyester thread matching the existing thread.
- Nap time
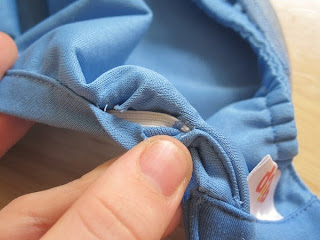
1 - Using your wiley fingers, feel along the leg opening for the end of the elastic. It will feel like a little bump within the leg casing itself.
2 - Using the seam ripper, and being very careful not to rip the fabric, take out a few of the stitches. I find it easiest to rip out at least 1-2 inches worth of stitches. Repeat at both ends.
3 - Ta-dah, you have discovered where the original elastic is attached. Remove this using your seam ripper, or cut as close as you can to the end of the elastic, leaving a little stump. Get rid of that old loose elastic.
4 - Pin your small safety pin to the end of the new elastic and thread through the leg casing.
5 - Pin at one end only to keep the elastic in place.
6 - Stick under your sewing machine foot, turn the wheel to push the needle through the elastic and PUL, then remove the pin. This is quite tricky to do, and you may find it easier to release more stitches from the leg casing. With lots of swearing, get it into place, and sew back and forth over the end 4 or 5 times to secure. Repeat at the other end.
7 - Now you're ready to sew the leg casing back into place. Checking both sides are in the correct postion, pin and sew. Pull fairly tight as you sew, and try not to sew over the elastic now hidden inside. Remember to overlap your new stitching with the old to make sure it doesn't unravel. Repeat at the other end (I don't know why this picture is the wrong way round).
Yay, All Done!!
And for comparison, here's just one side of my Moonbeam Flip fixed. See how bad the elastic was?


No comments:
Post a Comment